So you’ve decided a walking tour is for you and settled on the perfect trail. Now what? There are three ways to work out all the details: DIY, Easy Mode, and Hybrid. DIY means you personally plan and reserve every service and accommodation yourself. Easy Mode means you hire a self-guided tour company to work out all your details for one large fee. And the Hybrid method, as the name implies, is somewhere in between.
Do It Yourself
The DIY method requires a moderate level of planning acumen. There are many moving parts and you must be flexible and able to understand how each part affects the whole. You will be required to juggle emails, place numerous international phone calls, and make decisions about services or accommodations without a ton of information.
There are two advantages to planning the trip details yourself:
First, cost. Planning yourself can be significantly cheaper than hiring a tour company. Particularly if you are going by yourself, most tour companies will charge an extra fee on top of the quoted price because their price assumes at least double occupancy in each booked room. On the other end of the spectrum, if you are planning to go with a larger group of 4 or more, planning yourself can also be considerably cheaper by finding rooms that can accommodate a larger group, thereby consolidating the number of rooms booked and saving money.
Secondly, by planning every detail you will force yourself to research the route to a much greater degree. Likely you’ll be consulting your guidebook and websites to research each town in which you plan to stay overnight. Through this exercise, you will familiarize yourself with each village, its history and what services are available therein.
Initial Planning
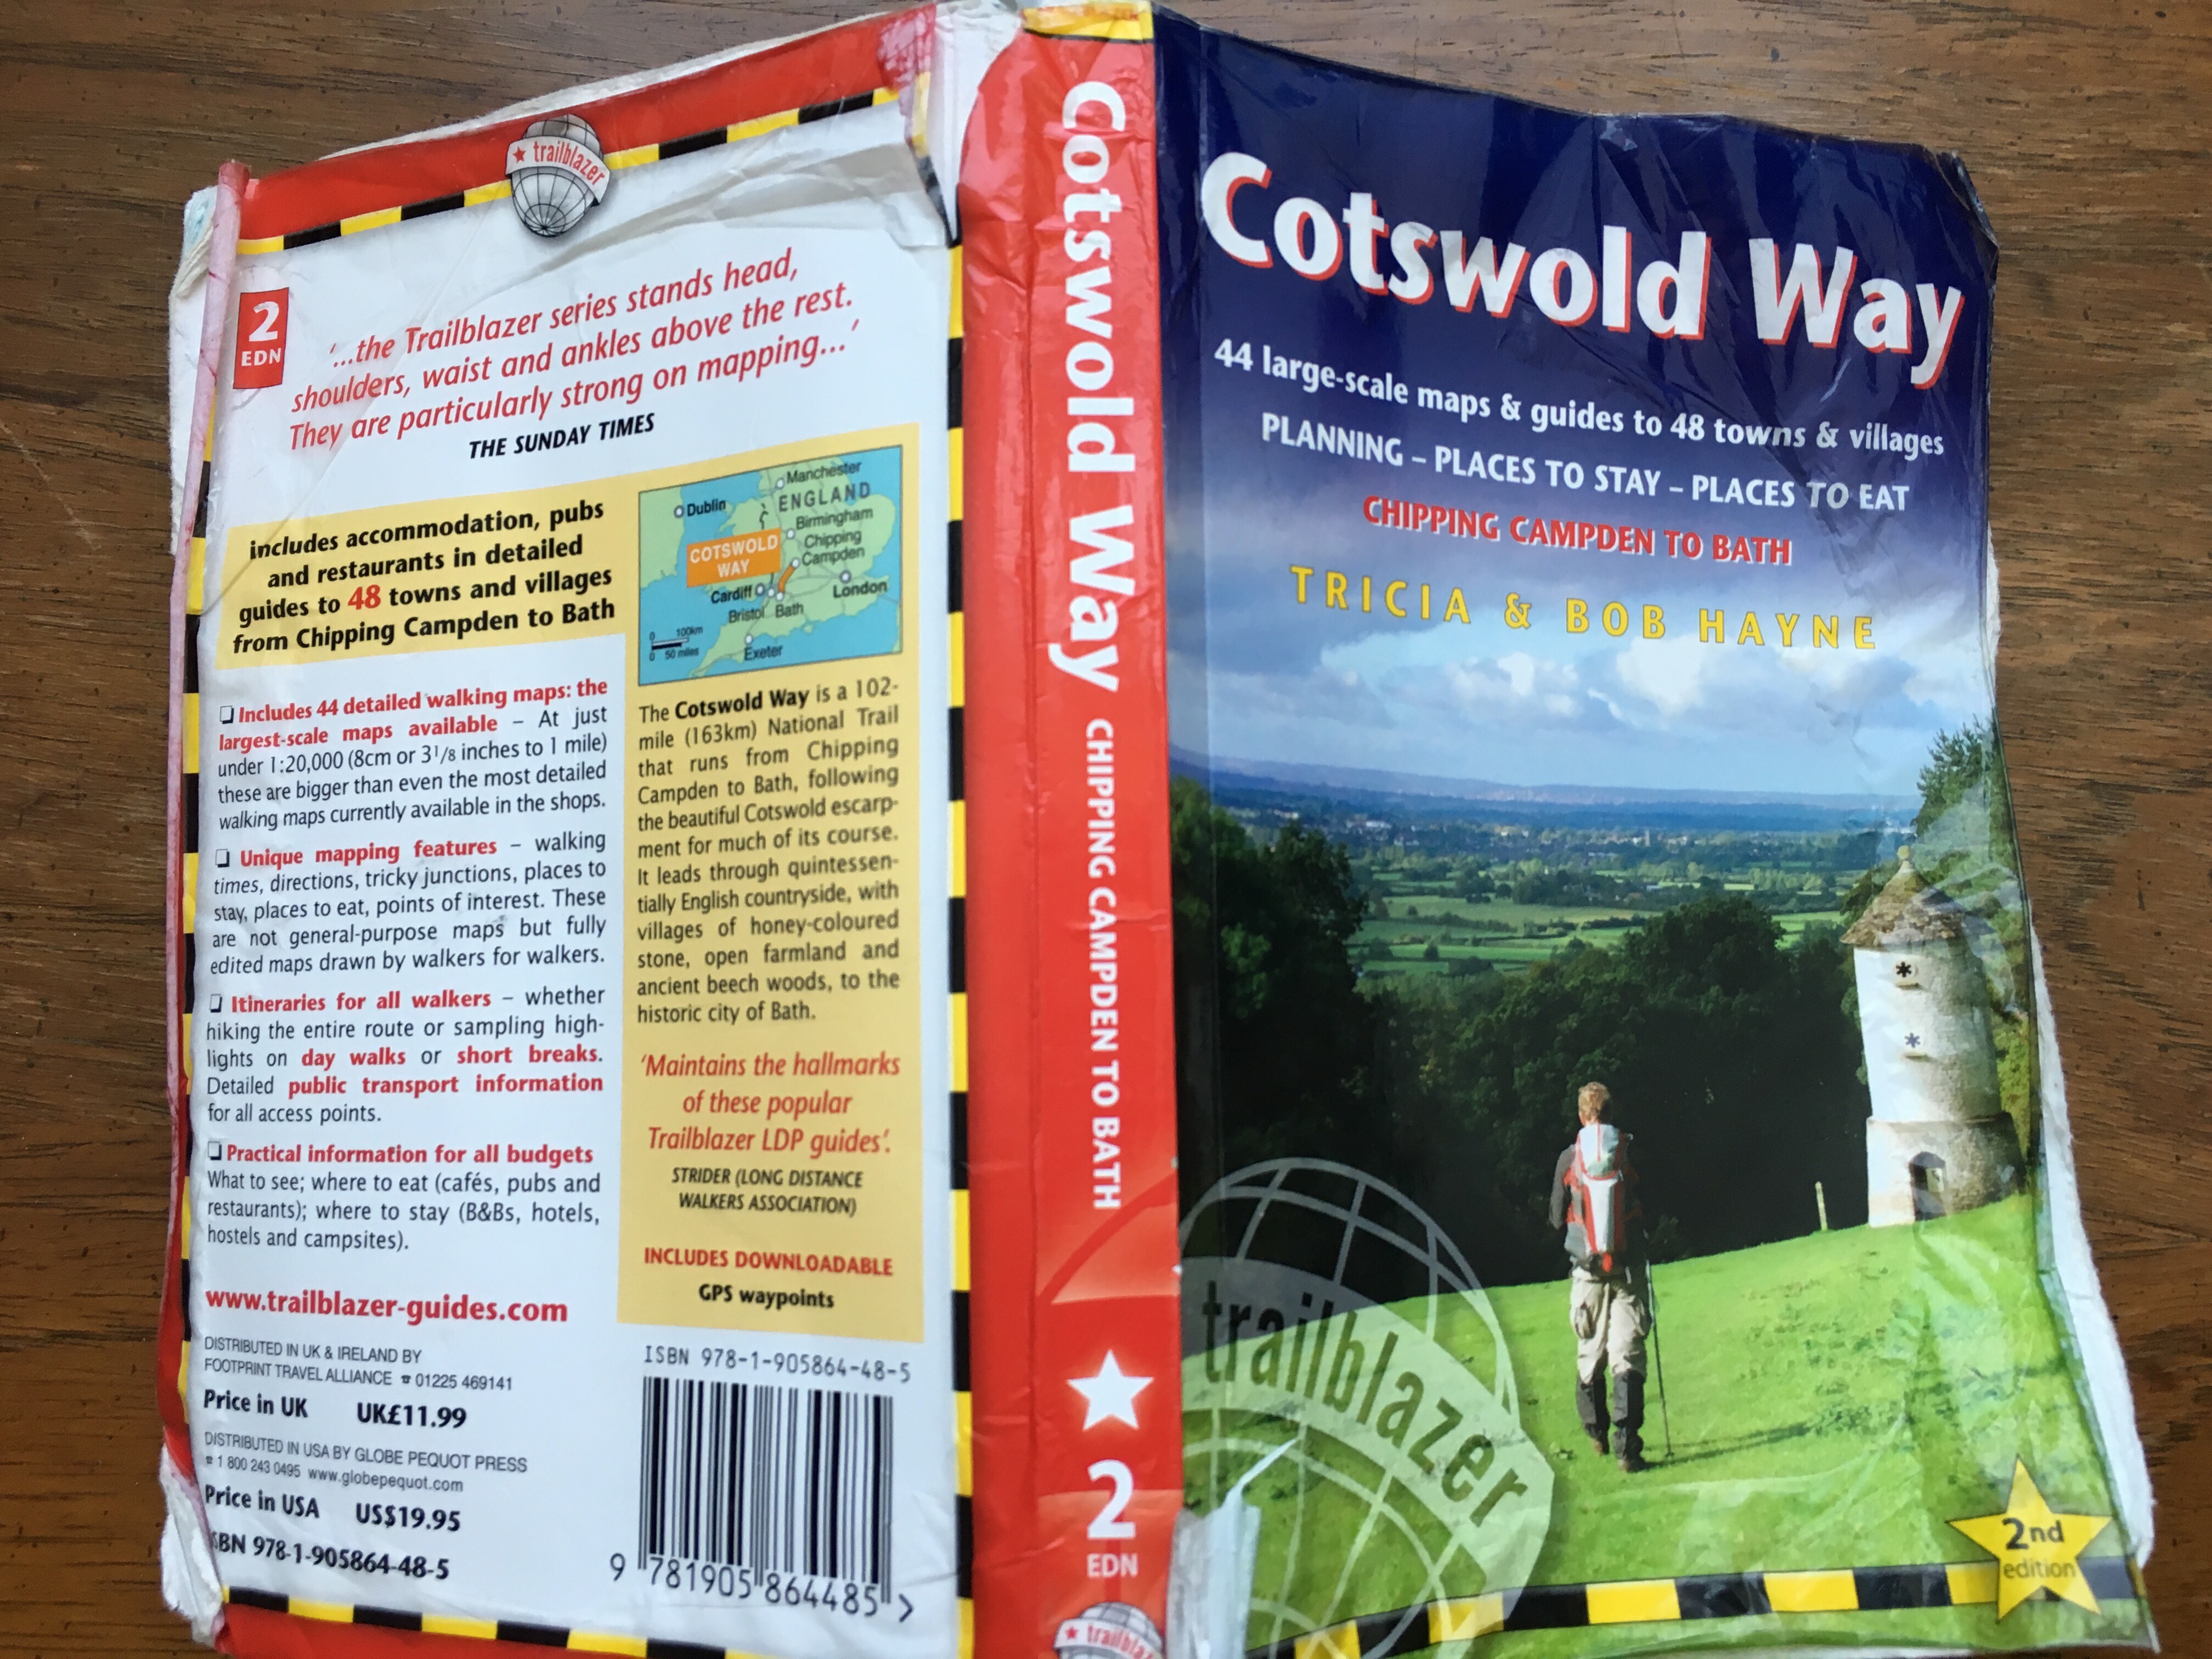
Before you begin to make reservations, buy a reputable guidebook for your trail. I recommend the Trailblazer Guide series. Your guidebook will contain most of the information you need to plan your trip and will also serve as your go-to map on the trail. Additionally, many of the trails have websites that are run by societies dedicated to that specific trail. These websites often contain planning information, including route detours, route planning information, and accommodation information. One site that is particularly helpful is Sherpa Van. In addition to providing reliable baggage transfers (discussed below), Sherpa Van’s website contains a wealth of content written by walkers for most of the accommodations in villages along the most popular routes. Tripadvisor is also helpful but be sure to filter your reviews to show reviews by walkers.
After you have received your guide, the first order of business is to determine how many days you will be walking. With a guidebook, this becomes somewhat organic. The routes often work the best with a walk planned around a certain number of days based on the terrain and distance between villages.
Now that you’ve settled on a walking duration you must determine how many travel days and rest days you want to have. You need to afford yourself enough time to get the trailhead and be ready to walk first thing on the morning of your first day. It is highly recommended that you stay near, preferably walking distance to, the trailhead the day before you start. Not only does this make getting to the trailhead a no-brainer, but it will also make your baggage transfer easier.
Rest days are helpful but not always necessary. I like a rest day after the last day of walking. You can also plan a rest day in the middle of the walk. Make sure you pick a place where you can be entertained for a night and entire day. Some villages are very small and may not have businesses open for lunch.
You should now have a total number of days needed to accomplish your walk. My Dales Way walk looked like this: Day 1: fly overnight direct to Heathrow. Day 2: connecting flight to Leeds. Land, taxi to Ilkley. Day 3: Hang out in Ilkley Day: 4-9 walk to Windemere on Bowness. Day 10: Rest in Windemere on Bowness. Day 11: Travel to Manchester. Day 12: Depart from Manchester. I need a roundtrip ticket for a 12-day window.
I afforded myself enough time on Day 2-3 to get to the starting village and relax before beginning. This bumper time became crucial when my plane was delayed and I missed my connecting flight, with no chance of picking up another flight to get to Ilkley on time. I ended up ditching the airport and finding a train that got me into town way off schedule but with plenty of time to sleep before starting. Plan for delays.
Air Travel
Because air travel is likely to be the significant cost of your journey, much of your planning will revolve around when you can find the cheapest ticket. I do not have many tips regarding finding the cheapest ticket. There are many dedicated air travel websites that can help you with the tips and tricks. I will say, though, I’ve had good luck with booking multicity round-trip tickets, for example, flying into Heathrow but out through Manchester. Airlines call these “open jaw” tickets. Also, the further out you plan, the higher the chance of scoring that awesome ticket. I like to set up Google Flight alerts for a few different options.
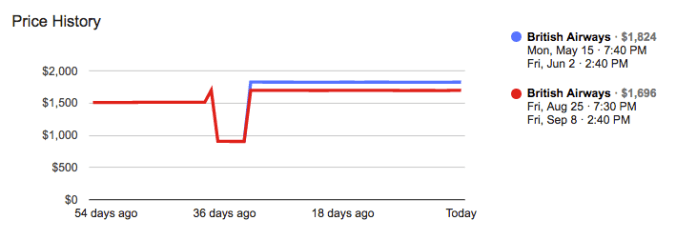
What exactly is a cheap ticket these days? The unavoidable fees and taxes associated with international travel these days are egregious. I booked one ticket direct to Heathrow using points. The fare was free but the fees and taxes were still $650. It appears at the time of writing this that taxes and fees have been reduced to around $400. After the Brexit vote, there seemed to be a bit of a panic and I was able to find tickets with very low fares, some $150 or less. Total price: $800.
Flexibility will be the key to finding the best ticket price. Plan early and be willing to leave and return at unpopular times. BA flies direct to Heathrow from PHX once a day, but it’s a red eye. It’s a tradeoff I’d gladly put up with — missing a few hours of sleep to not be traveling for 15+ hours.
Timing Is Everything
Once you’ve found an affordable ticket, don’t book it. Reserve it. You need to make sure you can secure accommodations before you commit to a ticket. Of course, if your trip is planned for a less popular trail or is still over six months out, you’re likely going to be able to secure accommodations for any trail and can pounce immediately on a good ticket. Just don’t wait long to try to book your accommodations.
Accommodations
By now you should have a rough idea the area you want to sleep in after each day’s walk. It’s time to start researching your accommodations. For purposes of this post, I will not be discussing camping options. While camping is definitely an option, I’m not experienced enough to comment on it. Just know that with camping, baggage transfer (discussed fully below), which makes your walk much more enjoyable, will likely not be an option.
On the trail, you will find a few different lodging options. Commonly, in the villages, you will find family-run inns (a restaurant or pub with attached apartments) or bed and breakfasts. In between the villages, there are country houses with rooms for rent. Occasionally, in a larger town, there may be a small hotel. Most accommodations offer a full English breakfast built into the cost.
It’s important to realize that most of these accommodations are owned and operated by locals and are modest. Rooms are not always the most comfortable or hotel pristine. If you don’t feel like the guide or websites are giving you enough information about an accommodation try Trip Advisor. Not all rooms are “en suite.” En suite means that there is a private bathroom in your room. If the description does not mention en suite, it’s likely that the bathroom is shared with other guests.
One of the elements of a good accommodation is the personality running the place. The innkeepers can make your night. Pay attention to this detail in the reviews.
Break out your guide and start contacting your preferred accommodations, starting with accommodations in the area towards the beginning of your trip. Work your way through the days to the last days of your trip. Most accommodations answer emails within a day. You may need to call some accommodations. Many, but not all, room reservations require a deposit. Don’t put a deposit down until you have determined there is accommodation availability for the duration of your walk. Be sure you have directions to each accommodation.
If you can’t find an accommodation right on the route, consider looking for accommodations a few miles off the route. Many accommodations will pick you up from and drop you off at the trail. Some will even drive you into town for dinner.
I like to have email confirmations of all my reservations. Once you have reserved all your lodging for the walking portion of your trip, you can confidently purchase your air travel.
Lunch
Breakfast is usually included with your lodging. Dinner is usually available around your accommodations. Occasionally, lunch might be tricky to find. This can happen for a couple of reasons. First, there might not be a single restaurant or store on the route until you finish for the day. Secondly, while there might be a pub or two, they don’t serve food all day. Many pubs are not open for lunch and those that are, often stop serving food at 2pm. To address this issue, many accommodations provide simple packed no frills lunches for an extra fee. If you think you need a packed lunch, it’s important that you make arrangements before you check in.
You may also be able to buy a premade sandwich and other vittles in the occasional village convenience store. On the Dales Way, I was enjoying one such lunch. As I was chewing on my bacon sandwich I was thinking about how much of a badass I was for not stopping for lunch. Unfortunately, I was walking so quickly that I was breathing pretty hard. The result was a big lump of chewed up bacon sandwich in my windpipe. Eyes bulging, I managed to finally cough it up. Lesson: you’re not a badass for walking and eating at the same time.
Baggage Transfer
Remember, a British walking tour is not like a wilderness hike in the U.S. This is intended to be a pleasant walk, not an endurance challenge. One of the great services provided along the British footpaths is baggage transfer. When you hire a baggage transfer company, they pick up your baggage in the morning from your lodging and drive it to your next accommodation. This allows you to travel lightly with a day pack and a few necessary supplies.
Hiring a transfer company is easy. I recommend Sherpa Van but there are plenty of other providers. The cost for Sherpa Van is roughly £8 per day, per bag. You must work out all your accommodations before hiring a baggage transfer company unless you use the Hybrid method discussed below.
Easy Mode
If you don’t have the time or inclination to get bogged down in the details of your walk, consider hiring a self-guided tour company to take care of your arrangments. A tour company will send you the necessary maps and guides, arrange all your accommodations, hire baggage transfer providers, and provide support along the way if needed.
I’ve used Mac’s Adventure. They were great but there are many other companies out there. You will still need to arrange your own airfare and transportation costs. Do not book airfare until your tour company has confirmed your trip.
Hybrid
While booking my Coast to Coast walk I stumbled onto a Sherpa Van service of which I was previously unaware. In addition to baggage transfer services, and for a small fee, Sherpa Van will contact any accommodation listed on their site to make your reservations for you. In the event that your preferred accommodation is not available, they will arrange an alternative for you. This method allows you the freedom to pick your accommodations (subject to availability) while not needing to contact them each directly and juggle dates, reservations, and confirmations. The fee is per person. For 14 nights worth of accommodation, I paid roughly $50 to make all the arrangements. Money well spent.
Transportation
Whether you do it yourself or hire a tour company, you must arrange your own transportation to the trailhead and onward after you’ve finished your walk. The UK has a fantastic public transportation network. Trains can get you close to almost any part of the country and, when they can’t, taxis or buses take you the last few miles from a train station. Sidenote: while some of the bigger cities have Uber, it is virtually non-existent in the rural areas.
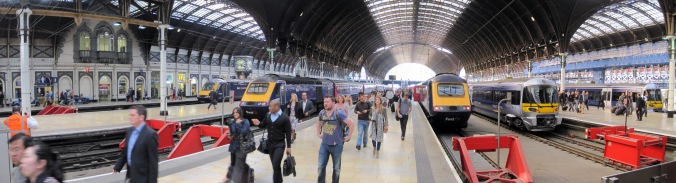
If you land in Heathrow, there’s a great (albeit expensive) new train, the Heathrow Express, that runs directly to Paddington Station (note: book online in advance to save on Heathrow Express tickets). Otherwise, the underground is a lower cost, much slower, alternative. From Paddington, the country is your oyster. Buying train tickets well in advance can save you money and make your transportation experience slightly less stressful.
Consult your guidebook concerning transportation to your trailhead. A good guide will have information on closest airports and train stations. Google maps also is a great source of public transit routes, times, prices, and links to buy your tickets.
Gear
Luckily, with baggage transfer, you won’t be bogged down with unnecessary gear during your walk.
Essential Gear
First and foremost, the most important element to your gear is your shoes. Nothing will ruin your walk faster and more thoroughly than miserable feet. Robust hiking boots are not necessary but you will need more than tennis shoes. Many trails have very steep elements. You will need traction. More than traction, you need water resistant shoes. Britain is wet. Very wet. Some trails include miles and miles of bogs. Get shoes that can resist a lot of water and mud. Wet feet are not happy feet.
Likewise, wool socks are highly recommended. Preferably with an extra pair or two in your day pack. Wool will not only keep your feet warm but also dry relatively quickly should your shoes fail.
Simple first aid items are helpful. Motrin, blister pads, moleskin, anti-chaffing bar, and a spare ace bandage have all helped me in the past. Don’t forget the toilet paper.
You will need a daypack with a water bottle. A small 20L-30L backpack is fine. I really like having pockets for my water bottle on the side. A bladder will work as well but I prefer to just buy a liter or two of water rather than having to ask to fill a bladder. If your daypack is not waterproof, buy a cover for it.
It will probably rain. You need rain gear comfortable enough to walk in for an entire day if necessary. I like a waterproof, light, wide-brimmed Boonie hat, a rain shell jacket, and wicking material hiking pants. It’s important to be able to get your rain gear on quickly; the weather can change fast.
While most of the trails are very well way-markered, a good guide and/or map are essential. On a long, less well way-markered trail, consider a detailed map and compass.
Keep a folder with all your travel info handy. Include travel insurance information, accommodation directions, and email confirmations. Do not count on your phone.
Nice to Have Gear
Hiking clothes are nice to have. I have a single pair of hiking pants and a handful of hiking long sleeve shirts that I wear and wash while walking. Clothes made for hiking are breathable and dry quickly.
Walking poles make ascents and descents a little easier. I started with a cheap collapsible one and upgraded to more robust poles.
It doesn’t get terribly cold in the summer but having a few layers on hand can make your walk more comfortable. I have a fleece, pair of gloves, and beanie handy.
One item I highly recommend is a digital map. They are not cheap, but a Harvey digital map can save you miles of unintended wandering. Follow the instructions on the website to load it to your GPS enabled phone and let it track your position while you walk. With a 5 second glance, you can determine whether you’ve strayed from the preloaded highlighted path. I will not hike without one of these maps.
Odds and Ends
There are a number of small items you should consider taking care of before you head out.
Travel Insurance
The main purpose of travel insurance is to reimburse you for any accommodations or transportation reservations that get canceled. That’s all fine and good but one of the other perks of travel insurance is more relevant to our endeavor. Travel insurance provides emergency services, such as airlifting and other ambulatory services. There’s nothing terribly extreme about a walking tour, but some of these areas are very remote. If something should go wrong, you will be covered. World Nomads is what I use.
Cash/Credit Cards
Carrying cash in the countryside is generally advised. Most small businesses prefer cash. Generally, the threat of pickpockets and thieves is much lower than in the touristy spots. Most villages will have an ATM. A good guidebook will have information about cash withdraw services.
When you do need to use a credit card, try to use a card that does not impose foreign transaction fees. The U.K. is light years ahead of us on touchless (or as they say, “contactless”) technology. Apple Pay, Google Pay, so on offer quick and easy payment options.
Phone
Set up international roaming service for your phone or you might encounter a nasty bill. WIFI is available in most pubs and accommodations but you may find yourself with very spotty or nonexistent service occasionally. Also, data signals are very sporadic. I find with a data plan and an eye out for WIFI networks, I can find at least one place to make a call a day. If you have an unlocked phone, you can pick up a £30ish sim card loaded with a generous data plan at almost any wireless store.
Beer Tourism
I love real ale. Finding a pub that serves a proper pint is a big deal to me. Unfortunately, not all pubs are equal. There are some truly awful establishments out there. Also, there are many local looking pubs that are owned by huge restaurant groups that produce a dining and drinking experience on par with Applebees. If you want to find the best traditional pubs and the best traditional beer, you must do research beforehand.
The Campaign For Real Ale (“CAMRA”) produces a number of products that will put you on the right track. If you want to do a good bit of research for your trip, buy the most current version of CAMRA’s Good Beer Guide. The beer guide is an amazing resource that has led me to a number of gems I would have never found otherwise. The problem with the guide is that it’s too big to carry around. Luckily, CAMRA recently released a fantastic new app that contains all the information in the guide plus a ton more. In order for the app to work, you must pay and small annual subscription and have access to cellular data.
Education
A little bit of education will enrich your experience. Learn about the villages that you intend to visit. An overview of history and architecture will not only put context to your environment but you may impress a local by demonstrating a genuine interest in their culture. As an American, you’ll be walking through culture older and richer than anything you encounter at home. If you can put meat on the bones of history, the British countryside will become more than a pretty or charming place.
This concludes the American’s Guide To Planning An British Walking Tour. Click here for Part 1: The What and Why and here for Part 2: The Where, When, and Who.
