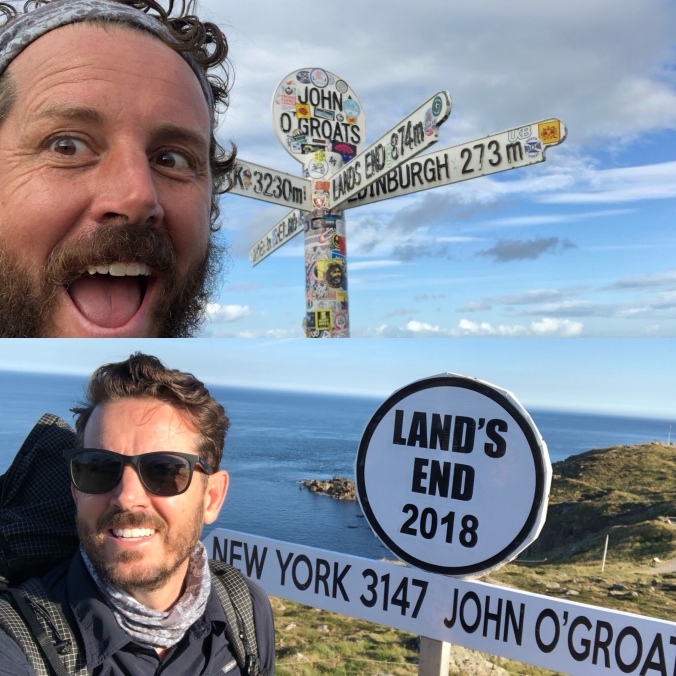
A walk from Land’s End to John o’ Groats (“LeJog”) is one of Great Britain’s most ambitious thru-hikes. Unlike other thru-hikes, LeJog has no set trail; the walker must make their own way between Land’s End on the most south-western tip of the island in Cornwall, to the most north-eastern tip at John o’ Groats in Scotland.
Preparing for such a long walk can be daunting. It requires quite a bit of time and careful planning. Below, I outline how I planned my walk, what worked and the unforeseen obstacles I encountered along the way.
Route
Background
In order to discuss how to walk for Land’s End to John o’ Groats, it is necessary to address the legal infrastructure of walking in the UK. The laws regarding walking in the UK are very different from other countries. Because the vast majority of British land is privately owned, walking any appreciable distance in the country requires the walker to walk through privately owned land.
The right to walk through private land did not become an issue until the industrial revolution when much of the population moved from agrarian villages to cramped and polluted industrial cities. Workers, who a generation previous, lived in and freely walked through the countryside, now found themselves drawn back to the countryside for a respite from the filthy reality of the industrial revolution.
The aristocracy initially tried to block city dwellers from walking through their estates. Where there once existed an ancient right of way through moor, wood or wheat field, now stood a stone wall, a thorny hedge and/or the threat of sanctioned violence or incarceration. Huge swaths of land were off limits to everyone except the landowner. Following decades of populous organization and civil disobedience, the English government relented and passed laws that codified the ancient tradition of Rights of Way. Consequently, in England and Wales, a walker may walk along any legally recognized footpath, even when that footpath cuts through a wealthy person’s land. Scotland took the notion a step further and codified the Freedom to Roam, which grants the walking traveler the right to walk through any land (subject to certain exceptions) in Scotland, as long as the walker obeys basic etiquette.
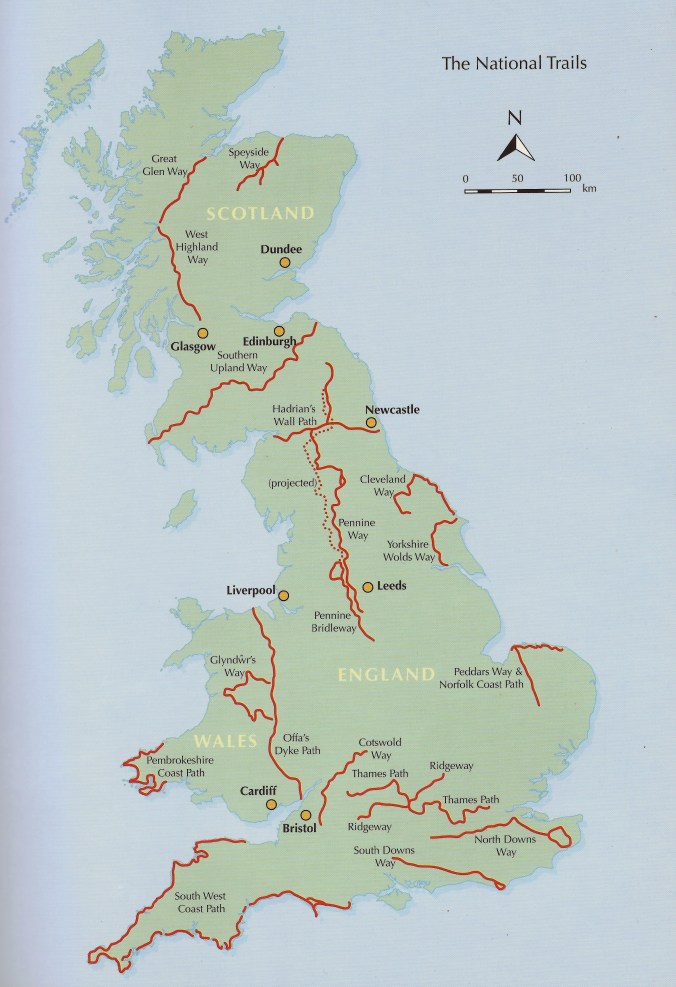
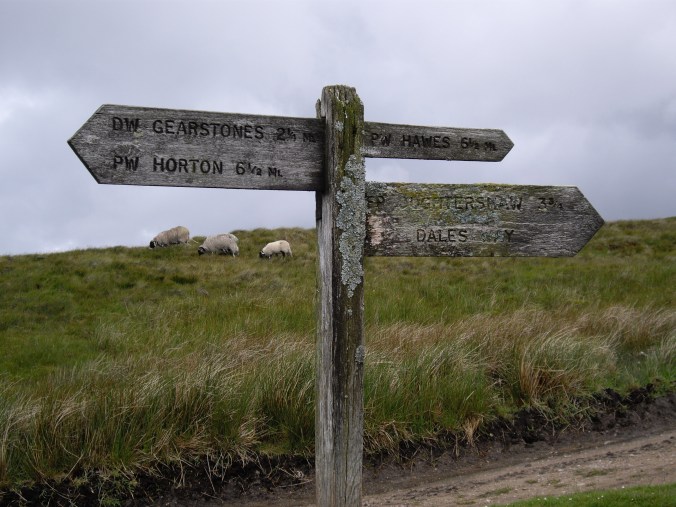
As a result, the British countryside is honeycombed with an enormous network of footpaths. A brief glance at Ordnance Survey Explorer map reveals a dizzying labyrinth of dotted green lines, each of which indicates a footpath. Over the last few decades, a number of long-distance footpaths have been developed, largely by stitching together already existing footpaths.
Traditionally, the distance between Land’s End and John o’ Groats by road is 874 miles. While there are many walkers who opt to walk the road route, most walkers, who prefer freedom, natural beauty and soft terrain, favor the footpath. There is no set footpath route between the two points, however, most walking routes end up around 1,200 miles.
LeJog: A Challenge, Not a path
One of the main reasons I was drawn to LeJog was the ability to change my route on the fly. I wanted to ramble; something difficult to accomplish on other long-distance trails with static routes. And it was so. With so many footpaths available, the ability to head a different direction presented itself almost hourly. There were many mornings I woke up and did not know where I would be later that day, often changing my planned path on a whim. Early on, when I realized I was ahead of schedule, I took a 20-mile detour south to visit a small village of one of my literary heroes. It wasn’t until the morning I started walking south that I had decided on the detour.
My goal was to be intentionally unintentional. Go where the wind blew, as long as that wind was generally blowing north. And generally, I felt like I was being spontaneous. However, the truth is that I stuck to my mapped out route 2/3rds of the time. And much of the time that I was not on that route, I was on an alternative path that I had mapped out long before I started walking.
Initial Planning Questions
Before you get down to the specifics of your route you’ll need to answer a few preliminary questions:
- How much time do you have? A typical LeJog footpath heavy route can be accomplished by a fairly competent walker in two to three months, and often less if you are a glutton for punishment and stick to the shortest routes possible. Some people choose to meander the whole country and take as much as five or six months. It took me 12 weeks. The walking season in the UK starts in early Spring and runs into October.
- Do you plan to camp or stay in BnBs? The British countryside is strewn with campsites. It should be noted that wild camping in England is generally illegal (exceptions include Exmoor and Dartmoor) but is generally tolerated in wilder areas in the north. In Scotland, wild camping is legal (exceptions include managed areas such as Loch Lomond) as long as the camper is being respectful. On my journey, I stayed at campsites most of the time and wild camped when there was no other option. I prefer to camp at a campsite simply because I like to finish my mileage by the late afternoon, relax and spend the night in a pub without feeling like I need to worry about my gear or finding a wild camp spot. Some campsites can get very busy during the caravanning season. Often, even when a campsite is full, they will make room for solitary walkers. While I never made reservations, there were a handful of times a campsite warden wrung their hands in frustration before finding me a spot.
- The cost of a campsite generally reflects a) how busy the site is and/or b) the campsite’s facilities. The cost on my trip ranged from as little as £5 and up to a whopping and indefensible £20 (on a slanted pitch in Peebles at Rosetta Holiday Park). Here is a link to a .gpx file will all the campsites I could find along my route (and some notable pubs). It is not exhaustive and I can’t promise all the information is still accurate. More campsite information can be found at https://www.ukcampsite.co.uk/.
- Of course, some people wild camp the entire journey, which is much cheaper.
- Staying in accommodations the entire trip is doable. It requires a lot of money and significant planning. Staying at accommodations every night generally requires you to book in advance, especially in the summer, which has the effect of making your walk completely inflexible. Should you get hurt, desire to walk more or less than your previously planned or take a detour, you’ll have to juggle your reservations. Finding accommodations on the trail can be tricky. As a result, you may find that your route will take you into more populated areas much more often than if you camped. As you move north and start walking on more popular long-distance trails, you should find it easier to find accommodations on the trail, often with an option of baggage transfer.
- Are there any areas you particularly want to see or avoid? Do you want to walk through Wales? Do you love coastal walking or prefer to slosh through the moors? Do you want to be alone or meander in and out of villages, towns and cities? Many ambitious walkers incorporate a National Three Peaks Challenge in their walk. Consider any special points of interest as you plan your route.
- Which direction do you want to walk? Most “end to end” walkers choose to walk south to north but some walk north to south, aka JogLe. Many of the long-distance footpaths employed by LeJog walkers are typically walked south to north. If you walk north to south, you will greatly reduce your chances of camaraderie on the trail, as most walkers will be headed in the opposite direction.Keep in mind that the southern counties of the island can get very hot in June and July and the temperature will cool off the more north you go. The day I left nuclear hot Arizona a heat wave started in the UK, which lasted weeks and resulted in the hottest summer in England’s recorded history. If the heat really bothers you, and you want to start in June or July, consider starting in the cooler north. By the time you get south, the hottest part of the summer will have passed.
Planning Methods
Planning for a roughly 1,200-mile journey is daunting. It took me months to iron out all the details. It can be a bit complicated but also a lot of fun. While there are few trails in which virtually all walkers gravitate, there are many, many alternatives along the way
It should be no surprise that planning begins with a good map. I know no better map than the Ordnance Survey Explorer Series Maps (“OS Map”). At a 1:25k ratio, OS Maps have incredible detail, including, most (if not all) public footpaths (including national trails), permissive footpaths, and bike routes.
Buying a digital OS Map is not cheap. I shelled out around $200 for the entire island – a very large file that I downloaded to my PC through a program called Memory Maps. Memory Maps on PC is a very powerful tool for planning walks and navigating while walking. Benefits include being able to draw routes over and adding points of interest to the OS Map. Once on your phone, you can access your OS Map with all your routes offline. When I walk, I turn on airplane mode, pop open my map and use my phone’s GPS to show me my location on the map within a few meters.
The program is not without a few glaring issues: 1) as far as I could tell, it’s not possible to draw routes from only your phone, which means you must have your whole route planned out before you set out, 2) the Apple computer version is next to useless (although iPhone app is ok) and 3) the app, as far as I could tell, has no way to measure the distance to your next point along your route – which makes planning on the fly a guessing game. Note: while the applications are free, besides the map (which you can download on up to five devices), there are a few other fees for cloud storage of your route information.
A much cheaper option is a monthly or annual subscription to the OS Maps through the OS company itself. This is a very popular option among walkers. Unfortunately, I don’t know if you can draw out routes over or add points of interest to the maps.
The second powerful planning tool I used was the GPS information found in the member’s section of the Long Distance Walker’s Association website. An annual membership to the LDWA will set you back £15-£18, which is well worth the cost. The LDWA has an archive of 1000s of long-distance footpaths, many of which are not signposted or indicated on the OS Maps. When planning your routes, these small connecting routes are extremely helpful in linking up with other routes.
Their path searching tool is extremely powerful. In the planning stage, I would search all known paths in a given area radius. Open the link to the path and download the GPS data directly into Memory Maps. After a few clicks, it was obvious whether there were any connecting routes. Where there were no obvious connecting routes or if I wanted to take a more direct route, I would simply draw out a new route over footpath markings on the OS Map.
With the OS Map overlaid with GPS path data found on LDWA, I was able to plan the bulk of my LeJog route, complete with alternate routes. It turned out, however, that I vastly overestimated the accessibility of random footpaths and some long distance trails in the LDWA database. Let’s talk specifics.
Here is a .gpx file with my walking GPS log for the entire walk. This is for reference only. Even though I made it through some of these sections, it was often not without unnecessary toil.
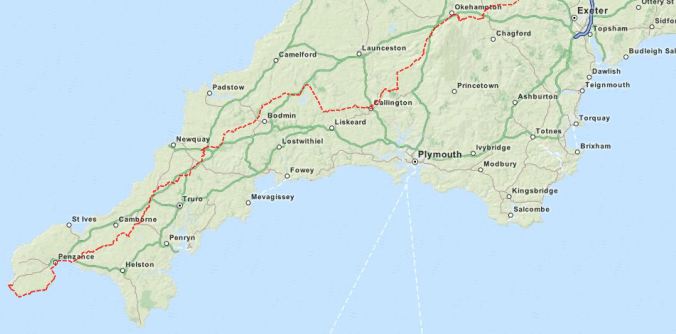
Cornwall – A Rambler’s Nightmare
From Land’s End the LeJog footpath walker has two options: 1) The South West Coast Path (the “SWCP”) or 2) a network of questionable inland footpaths. As far as I know, there are no well established long-distance trails north other than the SWCP. As such, many walkers opt to strike north and west on the SWCP. However, many walkers, and I mean almost everyone I talked to that started out on the SWCP, greatly underestimated how difficult backpacking on the SWCP can be. It’s a rugged undulating path that will immediately test the limits of your fitness. I know of a few experienced hikers who ended up with joint injuries in their first couple weeks. Secondly, the SWCP is very indirect; 10 miles of northernly progress may take you 20 miles of walking on the SWCP because it dips in and out of every tiny geographic feature of the coast.
I don’t particularly care for coastal walking. I get bored with the one-note scenery and I knew that the SWCP would be more of a physical challenge than I wanted to start out with. So I chose to walk inland. At the last minute and against my better judgment, I changed my route to include a 10-mile walk along the SWCP headed east and north to Penzance. Granted I was I was tired from my 22 hours of traveling the day before, but that bit of the SWCP reinforced my decision to go inland. It was a rough start, which hit bottom on a washed out part of the trail that took me over a slippery boulder field. I spent an hour and a half in that boulder field, falling twice and twisting an ankle. It wasn’t until I met up with another bewildered walker that a local eventually showed us the trail, requiring a scramble up a little cliff with absolutely no signage. By the time I finally got off the SWCP, I was exhausted, sore and nearly out of water.
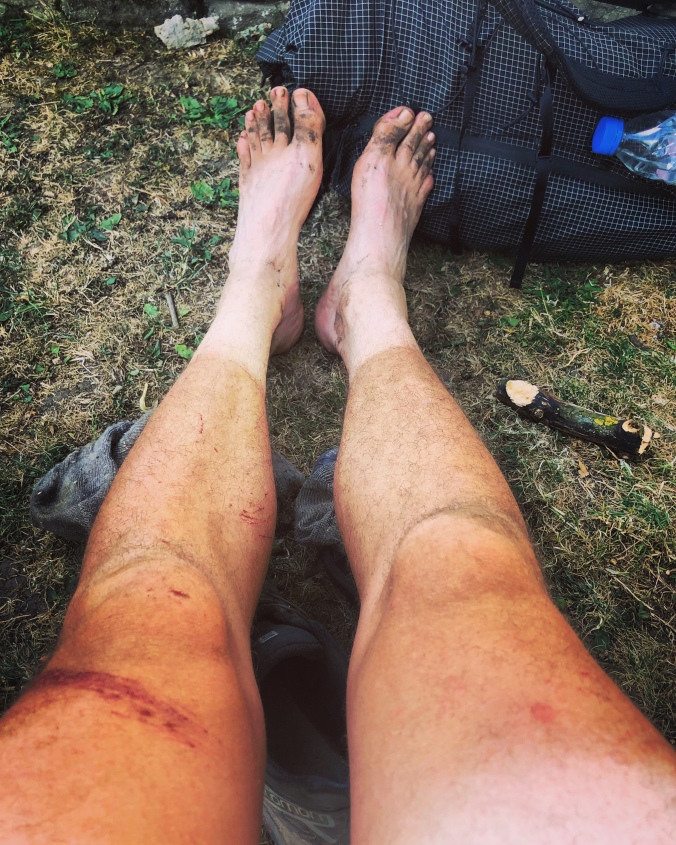
My inland route was basically along a path I found in the LDWA database called the Land’s End Trail. After a few days, it became clear that much of the Land’s End Trail had not been walked in many years. In the course of three days, I had to bushwack through no fewer than half a dozen overgrown woods. One so dense I resolved to keep pushing forward because I was sure I could not get back the way I had come. I was covered in thorns, the last one of which finally popped out of my knee 14 weeks later.
The other issue with this route was the landowners. Gates were locked. Barbed wire installed. Guard dogs on the path. A giant earthen mound at the end of one overgrown tree tunnel. I even had a landowner 1) tell me there was never a footpath on his property, 2) when I referred him to my map he said my map was old 3) when I told him it was the most current map he told me the footpath was gone but the map maker would only take it off the map for an extortionate fee. Every day, I was presented with another set of physical obstacles.
Overwhelmed and a bit defeated, I opted to walk a few days along the dangerously narrow Cornish country lanes until I could hook up with a traversable path.
In Bodmin Moor, I decided to cut across the moor to shorten my route. I did not follow a footpath and, predictably, found myself calf deep in the moor. It was at this point that I learned that you cannot trust google maps to help you navigate on foot. The app suggested I walk along the A30. That was not possible.
While I had a hard time walking in Cornwall, I found the Camel Trail bicycle path a very welcomed obstacle free day. The Camel Trail runs along a decommissioned railway. It was the first of many decommissioned railways, which are often (but not always) accessible on foot.
Alternative routes:
- South West Coast Path:
- Pros: signposted, designated on the OS Maps, great villages and obstacle free.
- Cons: Longer, redundant scenery, difficult at times.
- Mary Michael Pilgrim’s Way
- Pros: Occasionally signposted. Fewer obstacles.
- Cons: Very few signposts. Not designated on the OS Map, Not well traversed. Meandering, leading to a much longer path.
Devon and Somerset: Finding a Rhythm
Once I crossed into Devon, life became much easier. The footpaths were generally accessible except for the odd wheat or corn field where a footpath was not maintained.
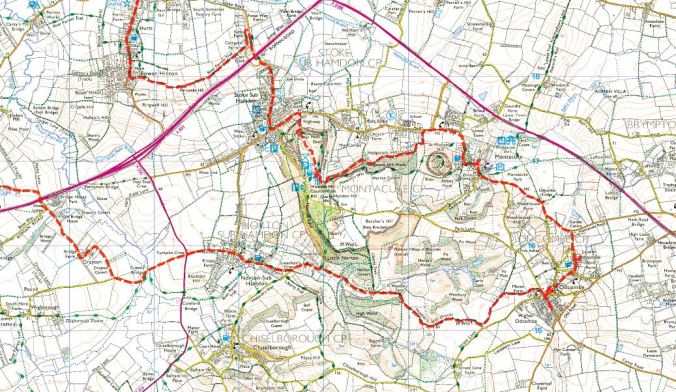
I walked a good bit on the National Bicycle Route 27/Granite Way into Okehampton. Easy, quick walking. Along the Devonshire Heartland Way into Crediton then into Devon following random footpaths through the Culm Valley. I blazed my own trail through southern Devon so I could visit a famous pub in Spreyton (the Tom Cobley Tavern). A last minute 20-mile detour to Odcombe to see the hometown of a literary hero. Through the Levels to what turned out to be my favorite pub (Halfway House in Pitney) of the whole trip. More random footpaths, blowing through Glastonbury and into Wells, where walking became much easier.
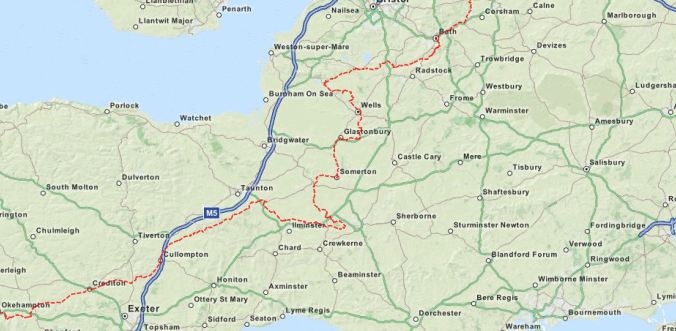
In Wells I picked up the West Mendip Way, the first regularly signposted and maintained long distance footpath of the trip. Up and over the Cheddar Gorge, and along the Limestone Link into Bath. Both of those footpaths were fantastic.
Alternative routes I considered:
- South West Coast Path:
- Pros: signposted, designated on the OS Maps, great villages and obstacle free. However, many people complain about the landowners in Somerset as they come off the SWCP. I did not have the same issues on my route.
- Cons: Longer, redundant, difficult at times.
- Mary Michael Pilgrim’s Way
- Pros: Fewer obstacles.
- Cons: Very few signposts. Not designated on the OS Map, Not well traversed. Meandering, leading to a much longer path.
Midlands and Peak District: Easy Miles
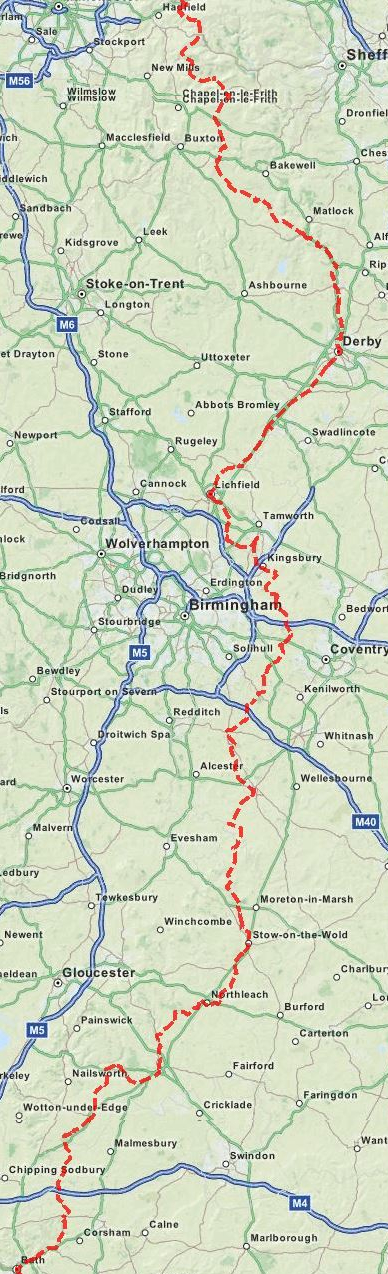
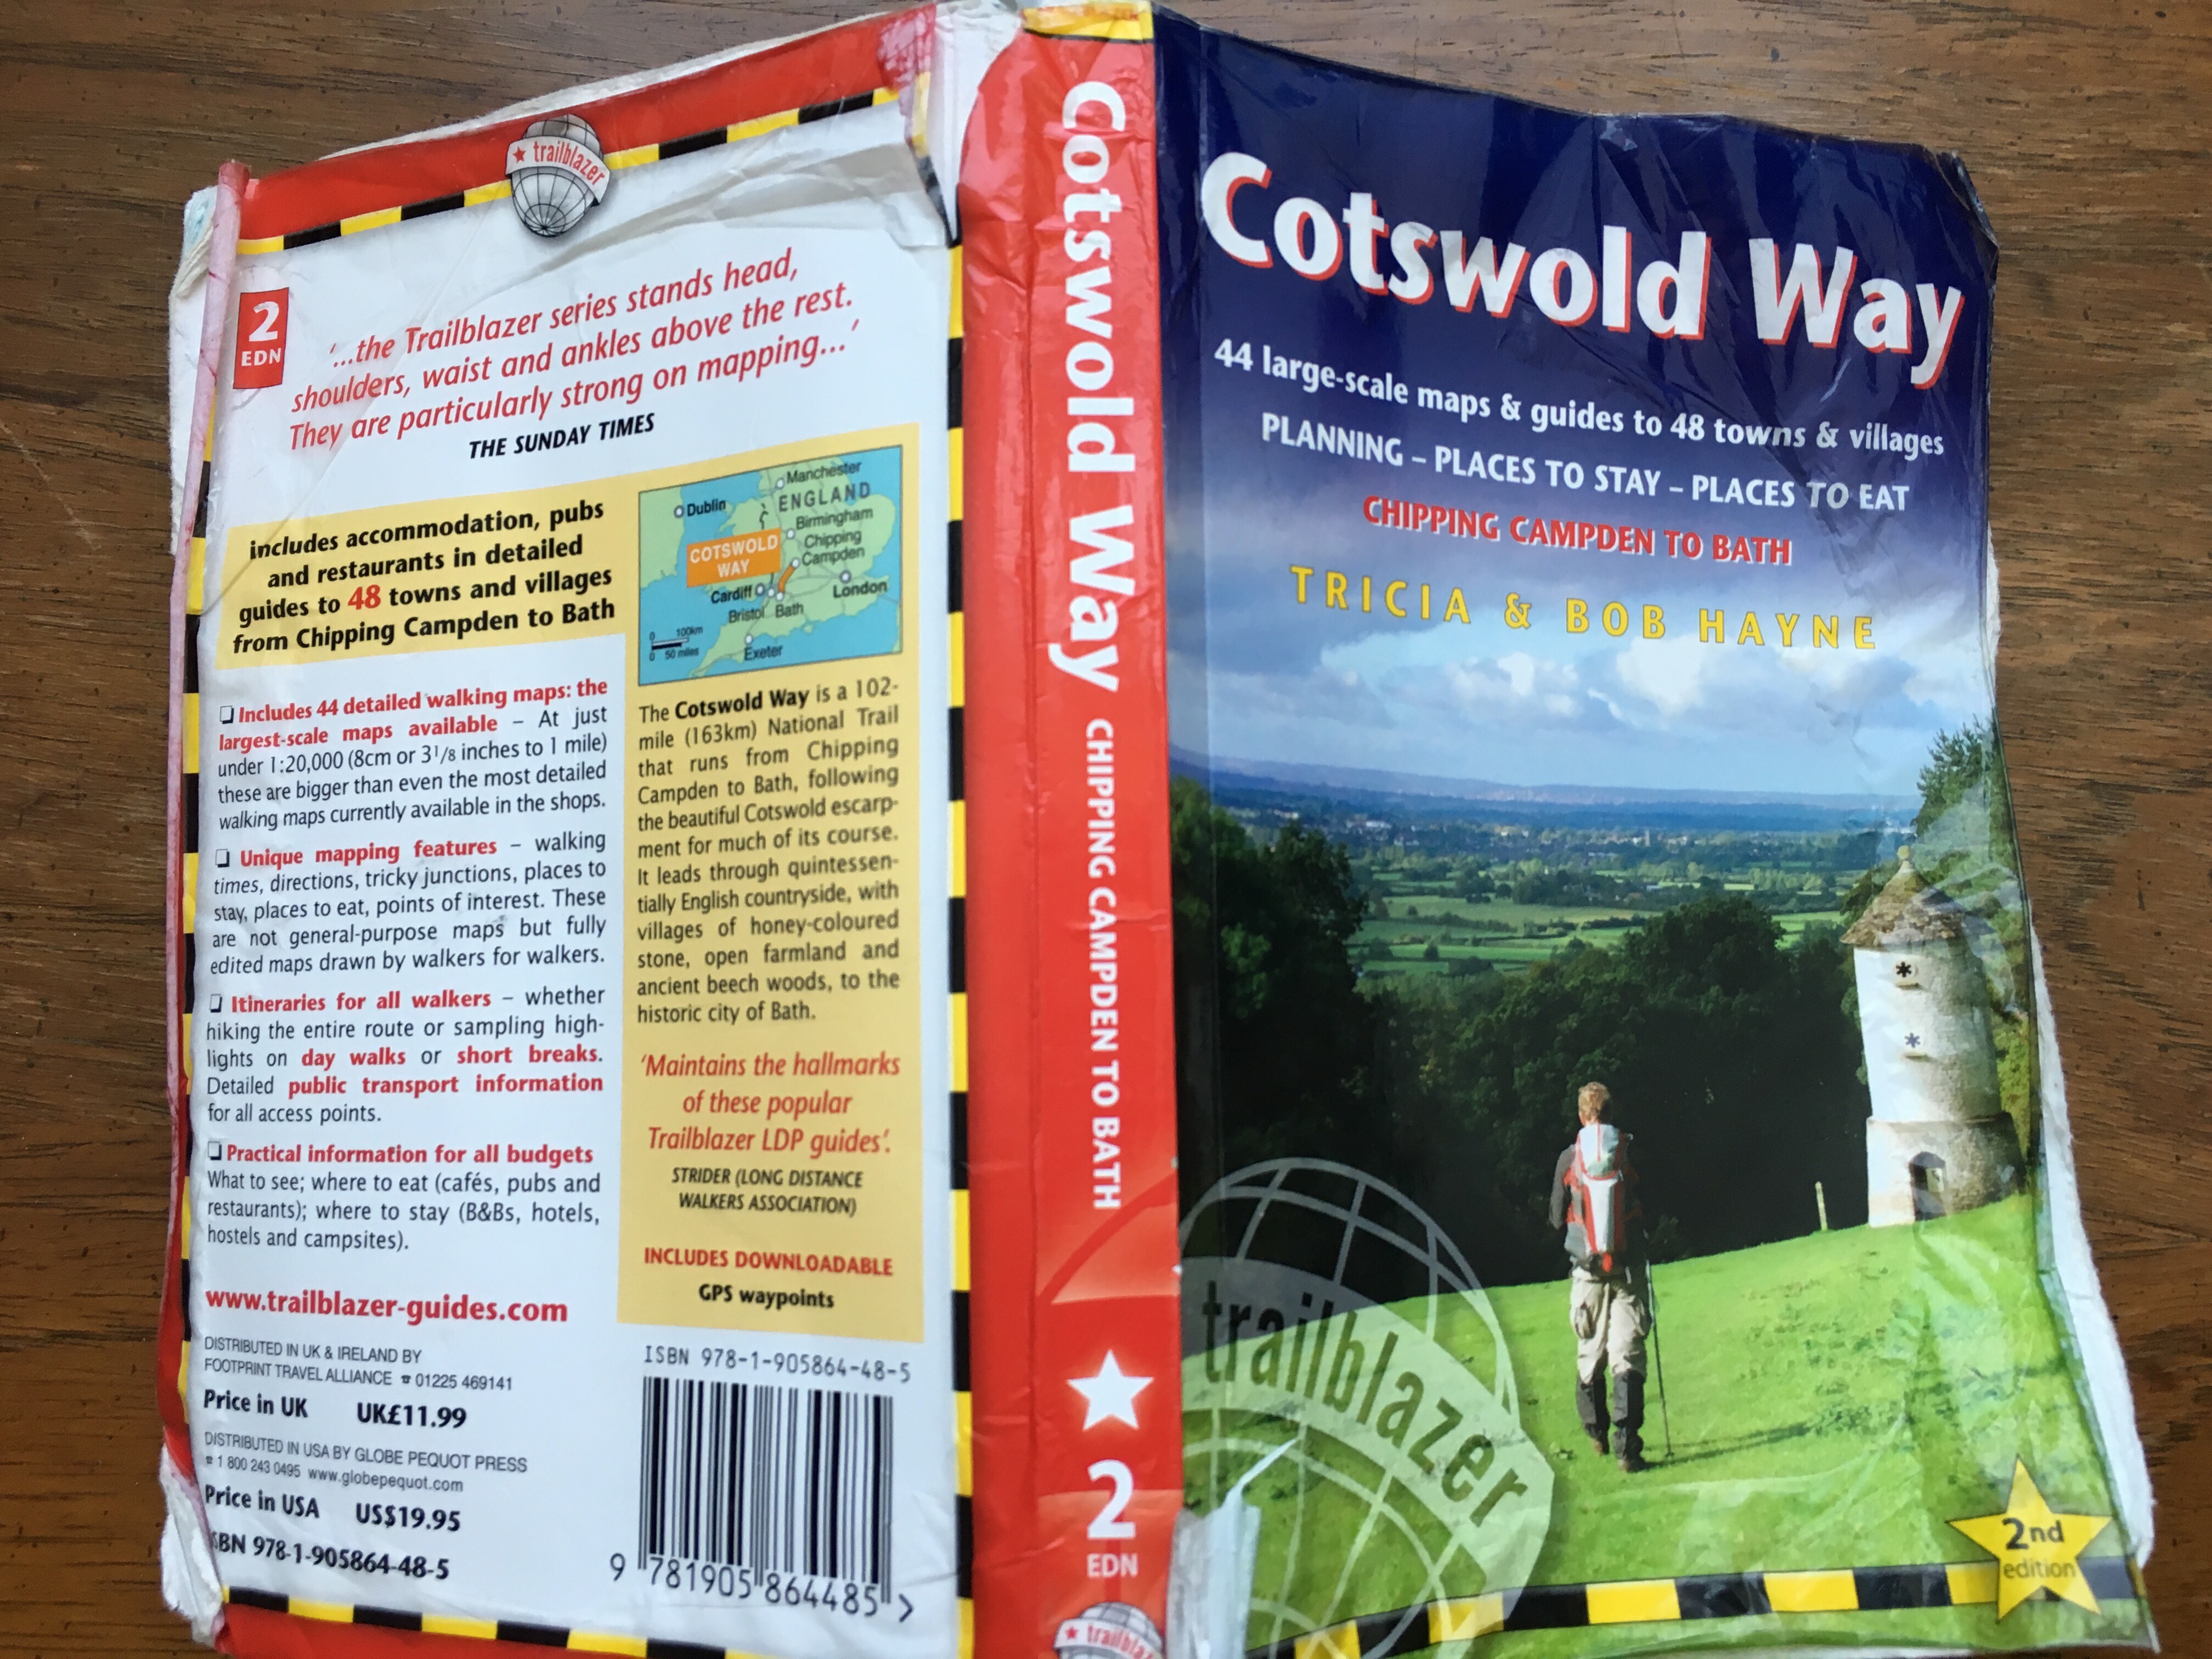
In Bath, I met up with some friends from the States. We walked along a portion of the Macmillan Way known as the Cross Cotswolds Pathway. This easy section runs east and parallel to the annoyingly hilly Cotswolds Way (which I had walked a few years prior). We followed the path, occasionally bouncing over to the Monarchs Way up to Burton on the Water. The Macmillan Way is a much longer trail. Assuming the rest of the trail is like the portion we walked, I can recommend it heartily. It was varied, interesting and well signposted, albeit with tiny white stickers.
From Bourton on the Water, we followed the 100 mile Heart of England Way, a very pleasant but often boring trail. We made two detours from the Heart of England Way, one into the tourist honeypot of Stratford Upon Avon and finishing in Burton Upon Trent, where we were treated to a spontaneous lock-in by a very generous and fun-loving publican.
I said goodbye to my friends and bounded north in a two-day 65-mile dash up the canals, through Derby, and then along two great trails: the Derwent Valley Heritage Way and the Limestone Way, both of which I would love to revisit. I landed in Edale, exhausted with a mysterious and increasingly annoying shin injury.
Alternative routes I considered:
- Cotswold Way:
- Pros: Signposted. Designated on the OS Map. Great villages and obstacle free.
- Cons: Annoyingly hilly.
- Severn Way
- Pros: Signposted. Designated on the OS Map.
- Cons: Often extremely muddy.
- Offa’s Dyke Path
- Pros: Signposted. Designated on the Os Map.
- Cons: Often isolated.
- Monarch’s Way
- Pros: Signposted. Designated on the Os Map
- Cons: The portion I walked was a bit more overgrown than the Macmillian Way.
The Pennine Way: Remote Desolation
I intended to take a day off in Edale before setting on the hardest portion of my entire walk: the Pennine Way (the “PW”). When I woke up the next morning I convinced myself I was well enough to start the hard slog up Jacob’s Ladder.
By the time I was at the top, after cursing the youth and vigor of a group of recent university grads, I was in serious pain. There was simply nowhere to stop. I had enough provision for two days but I wanted to stop somewhere I could relax for a couple days, like a chill village with a cafe or pub. I’ve done enough walking in the UK to know that I can wing it. I know that at the end of the day on a long distance path, there’s almost always somewhere to stop and relax, restock and rest. Unbeknownst to me, the trailblazers of PW wanted a path that specifically avoided such comforts in favor of a wilderness experience or as much as a wilderness experience as possible in England. So it was with a little annoyance I found myself in an isolated campsite that afternoon, eating dinner out of my backpack. The one silver lining was that I managed to beat the university grads, who got lost and shuffled grim-faced into the camp a few hours later.
I had to come off the trail after a few days to restock. At that point, I cast quite a pathetic site. Bearded, exhausted and limping in intense pain. It was a bout of shin splints – something I have never had to deal with.
But I pushed on. On day 4 of the PW, I came slightly off the path to stop in Hebden Bridge. Once I arrive, and reading reports of a huge two to three-day storm on the way, I decided to rent a room for a couple nights. It turned out to be a wise decision. While the storm was not quite as intense as planned, it drove most of the mulish walkers off the trail for two days. Also, I had a great time in Hebden Bridge, a place I plan to revisit this summer.
After two days off I set off to rejoin the PW, this time with an Austrian backpacker I met at my BnB. I was still in a lot of pain but every day I was a little better. With Klaus’ company, the lack of stabbing pain and a much more approachable section of the PW, I was in much better spirits.
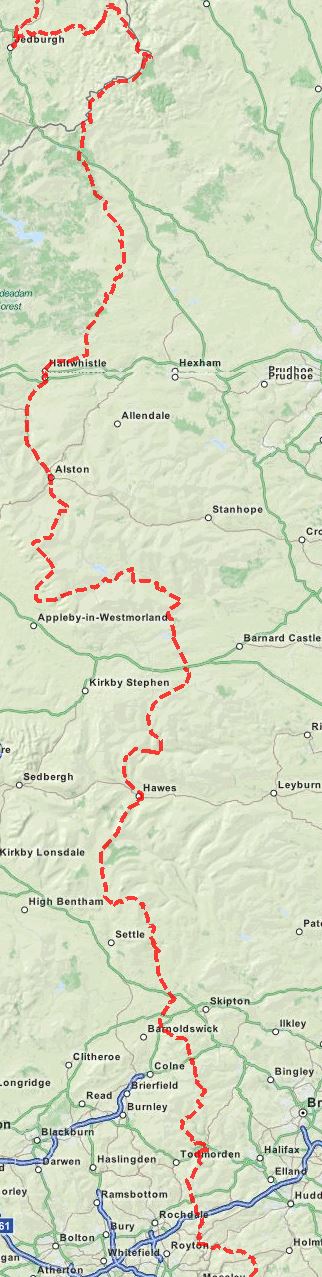
Klauss and I dutifully followed the PW except for a minor detour here and there until Alston. A quick note about Alston. The one campsite in town was very sketchy but very cheap. The facilities, accessed from a dark tunnel with no door, were in the basement of an old government building and looked like the set of a post-apocalyptic horror film, complete with “I killed my self here” graffiti on a bathroom stall door. From Alston, I picked up the mostly boring but very efficient South Tyne Trail, over the picturesque Lambley Viaduct and into Haltwhistle, where I booked a BnB and spent two days in one of the local pubs.
Klauss was exhausted and tired of the tedious PW so he quit, which is not uncommon among many PW walkers at that point. North of Hadrian’s Wall is the most demanding and remote section the trail.
I set off into the wilderness alone. I skirted a few miles of annoyingly hilly section of the PW that runs along Hadrian’s Wall. When I finally cut north, feeling I was entering the loneliest portion of my walk I met another lone backpacker from Nottingham, Adam. We walked the rest of the PW together. The last 75 miles of the PW was tough. A lot of staring at your feet while walking. Outside of Bellingham, no services until the end of the trail in Kirk Yethom. We slogged on, taking advantage of one of the rescue huts in the Cheviots.
The last day of the PW was the wettest day of my walk. In many ways, because it had been so dry and I managed to miss what little rain had fallen, I felt like I was somehow cheating. The PW is supposed to a boggy, muddy slog. Up until the last day, it was pretty dry with very little mud. That last day in the Cheviots was wet and slippery and I felt like I was finally on the PW.
Alternative Routes I Considered:
- The Pennine Bridleway
- Pros: Signposted. Quite a bit easier than the Pennine Way.
- Cons: It appears to me it’s not quite finished and it meanders quite a bit. Potentially a good bit of road walking.
Getting to Glasgow: Decisions, Decisions
Now into Scotland, I had two choices. I seriously considered cutting east along St. Cuthbert’s Way to the Holy Island but I was not too excited about the prospect of walking along the eastern shore up to Edinburgh. I was also interested in exploring the border towns. I decided a couple slow and easy days through the border towns would be more enjoyable.

So I set off west along St. Cuthbert’s Way to Jedburgh. Then onto the delightfully easy Border Abbeys Way to Kelso and Melrose. If there is one campsite to call ahead for, it’s the campsite in Melrose. From Melrose I opted for some light road walking along the picturesque National Cycle Route 1 to Innerleithen and then along the Tweed to Peebles.
From Peebles I had another choice. I initially intended to cut west for Glasgow but I had some extra time so I opted to go north. I picked up the unwaymarked and apparently largely untraversed St. Wilfred’s Way, which was challenging in parts, all the into Edinburgh. After a couple days of Fringe Festival, I set out on the easy, very uneventful John Muir Way, which consisted of gentle level coastal paths and miles and miles along the Union Canal. I passed J.K Rowling mansion, wild camped in an old growth forest and spent a day exploring sleepy Falkirk. From Falkirk, it was an easy 25 miles into Glasgow where I stayed with a cousin until my wife arrived.
Glasgow to John o’ Groats: Go North, Quickly
Most modern LeJog walkers end up in Glasgow. The West Highland Way and the connecting Great Glen Way offer a beautiful, well-traversed, well-signposted, well-provisioned, unobstructed route to Inverness. In earlier years, many more walkers chose to brave the wilderness of the western highlands up to Cape Wrath from Fort William. I’d venture that the vast majority of modern LeJog walkers are not equipt to walk the Cape Wrath Trail. It requires a good amount of fitness, real navigation skills and a willingness to enter the wilderness for prolonged periods. At this point in your LeJog walk, you’ll finally be able to imagine finishing and the prospect of the path of less resistance is too strong (more on that below) to ignore.
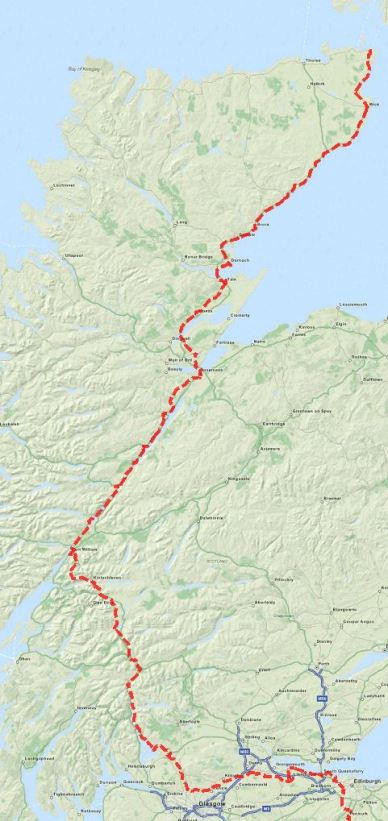
My wife and I set off up the West Highland Way. I saw more walkers and backpackers in almost any given hour than I saw during all my previous days combined walking LeJog. It was a bit overwhelming to be sharing the trail with so many people. It was a great walk. Not too challenging and conclusively the most picturesque portion of my entire walk. But also the most touristy.
After spending a few days with my wife’s family in Fort William, I set off by myself up the Great Glen Way. At this point, I was getting anxious to finish so I set off on Tuesday late in the afternoon and cruised into Inverness, 80 or so miles away, on Thursday afternoon, barely stopping to take in the scenery.
This seems to be a very common feeling for LeJog walkers. The closer I came to John o’ Groats, the more I pushed myself.
From Inverness, there are two options to get to John o’ Groats: walking the busy A9 motorway for about 100 miles or walking the not quite finished coastal John o’ Groats Trail for 150 miles. I fully intended to walk the JoGT but I could not check my impulse to move as quickly as possible, so I set off up the motorway, occasionally following discrete sections of the JoGT. It should be noted that almost everyone I know who tried to walk the JoGT eventually ended up on the A9. The path is largely untraversable from July to October due to the growing season.
So it was about 100 miles on the asphalt. Shambling into John o’ Groats was one of the most bittersweet moments of my life. A very unceremonious asphalt laden end to an otherwise fantastic walk.
Alternative Routes I Considered:
- The John o’ Groats TrailPros:
- Much more scenic than the alternative A9.
- Cons: Sparsely signposted. An additional 50 miles longer than the A9. Much of it is untraversable in the late summer/early autumn
- Cape Wrath Trail
- Pros: Very scenic. True wilderness.
- Cons: Technically challenging. Very remote.
A Word About Mileage
When planning, you must be honest with yourself about the number of miles you can walk in a day. The best way to gauge your ability is to get out and hike. Be aware that just because you can bag 25 miles a day on a weekend hike, it doesn’t mean you will be able to hike 25 miles day after day. One of the most difficult physical obstacles to long distance walking is the cumulative effect that walking a lot of miles every day for weeks has on your body. I was able to train up to 17 miles a day, so I started out with a soft goal of 17 miles a day.
On paper, my route, as planned, was around 1175 miles but my actual walking route was 1,322 miles. Many of those additional miles were from detours but more of them just were the result of underestimated mileage. Those first days, it took me close to 24 miles of actual miles to finish up my 17 “map miles.” While the map is a very good indication of how many miles there are from point A to point B, it’s always been my experience that, whether on a meticulously mapped National Trail or just winging it on a random footpath, it takes more miles to actually walk the route than planned. On a well developed long-distance trail, I’d say it’s usually of a factor of about 10%, meaning, if the map says it’s 10 miles, I should count on walking 11 on my gps tracker. On random footpaths, that factor can be as high as 25%, often solely because there are more obstacles on less traversed footpath.
When planning how many miles you think you can manage a day, be sure to account for all these extra miles. Also note, that my 1,322 represents miles backpacked and does not include the extra miles I put in every night to get to and from meals.
Rest Days
I took 16 rest days with 65 walking days. I could have easily lived with half as many rest days but because I had friends joining me on specific dates, I’d often force myself to slow down or spend a few days somewhere before they arrived.
Plan for rest days. Sometimes you just need to rest. You’ll very likely be injured to some degree or another and a couple of rest days could have a significant impact on how much you enjoy yourself and your ability to continue.
Fitness
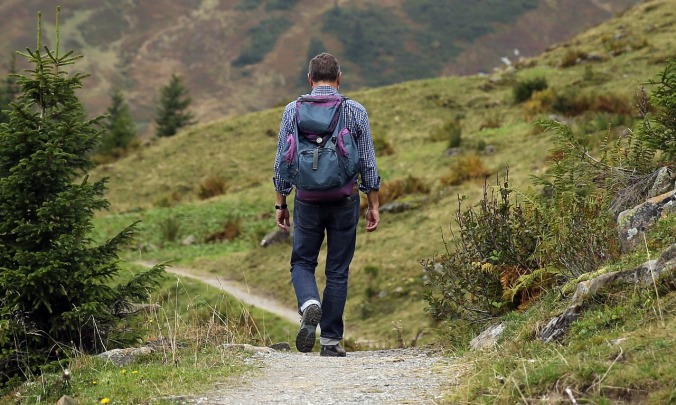
I highly encourage anyone considering LeJog to train. The best training is hiking, specifically with your gear. Get out there, find some hills and get under your backpack. Learn your gear and make adjustments accordingly. If you don’t have your backpack and shoes worked out before you start, you are inviting trouble.
I put in 500 miles over the course of a few months, 300 in the last 6 weeks. That may have been a bit of overkill but on day 1, I was putting away many more miles than anyone walking LeJog that I talked to. Try to work up to what you intend for a daily average on the trail. Be sure to give yourself a week of rest before you hit the trail.
If you can’t hit the trail that much, get a plyo box for step ups and put in as much time as you can at home. Again, in your gear, if you can. These step ups will allow you to train your negative strength, which you can’t get from machines like a stair climber.
Gear
Gear is highly personal. It’s all about finding what works for you. There is a ton of information out there for anyone wishing to really geek out. The maxim to heed is: the lighter, the better but not stupid light. My pack weighed about 8kg (roughly 18 pounds) without water and food. That’s pretty light for someone camping and was the result of spending a good deal of time stripping down to essentials and spending money on ultralight gear. I probably could have dropped another 2kg but I would have sacrificed a good deal of comfort. When you find yourself trying to drop a few more ounces by sacrificing crucial warmth or waterproofing, you’re stumbling into stupid light territory.
Getting your weight down requires a lot of thinking and arguing with yourself. First, make a spreadsheet and list every item you want to bring, including the weight to the fraction of an ounce. Unless you are very experienced, you’ll find your pack reaching into the 15kg range, if not more. Nothing will put an end to you LeJog adventure faster than a pack that is too heavy. It will wreak havoc on your joints and slow you down. You must -MUST- have a frank discussion with yourself about every single item in your pack. There are times when a few extra ounces are worth the extra comfort but most of the time if it’s not absolutely necessary, you should lose it.

Here is a list of my equipment. It took me months to strip away many of the items I wanted to bring:
- Zpacks Arc Zip Backpack, with chest and hip pockets. Ultralight, highly customizable backpack
- Zpacks Duplex Tent with lightweight stakes. A very light two-man waterproof tent. Perfect for an extremely tall man and all my gear.
- Walking poles. I am a firm believer in walking poles. I have bad ankles and they keep me balanced. I can walk faster with the poles. And lastly, they hold up my tent so I don’t need any other tent supports. Multipurpose items are almost always a good idea.
- Zpacks 40F (4.5c) sleeping bag. An ultralight down sleeping bag. Temperature ratings on sleeping bags are a bit misleading. Some people may find a 4c bag way to hot or not warm enough.
- Thermarest Neo Air (large, I’m very tall) with pump sack (I fully endorse the pump sack). This was a splurge item which added at least 4 ounces to my pack. I could have probably got by with the regular size. But I was much more comfortable, and for me, the comfort was worth the extra weight.
- Dry Bag Pillow. Stuff clothes in it and use it as a pillow.
- One pair of hiking pants.
- One pair of wool lightweight baselayer pants. Mostly for sleeping.
- One pair of hiking shorts.
- Two pair Exoffcio briefs. Great underwear for hiking.
- One synthetic collared, long sleeve, sunproof hiking shirt.
- One synthetic technical long-sleeved t-shirt. 90% of the time, my sleeping shirt.
- One wool t-shirt. A town shirt.
- Midlayer fleece.
- Two pairs of wool hiking socks.
- Lightweight semi waterproof gloves. In the summer you will rarely need gloves. But when you do, you’ll really need them.
- Very light waterproof jacket.
- Various rain gear: backpack cover, rain gaiters, rain kilt
- Beanie.
- Electrical bag: a 6000mah battery to keep devices charged. Headlamp. Various cords for charging. Type G adapter with usb ports. Stock ear pods.
- Toiletries: toothbrush, toothpaste, travel size deodorant, anti-chafe balm (highly highly recommended), comb, floss, facial razor, small amount of laundry detergent, small pocket knife w/ scissors, small lightweight towel.
- Medical: small stock medical kit (band-aids etc), Kinesio tape, knee straps (highly recommended), hiking foot salve, a handful of painkillers and sleeping pills
- Bag of random items: whistle, sewing kit, various repair items, lighter, spoon and fork, eyemask (really helped on those early light mornings).
- Poo bag: lightweight trowel, toilet paper, small container of Purell. You’re going to need it.
- Notebook and pen.
- Hiking umbrella. This was intended to keep the rain off, which it did, but also was very useful on hot sunny days. I attached it to my backpack for handsfree use.
- Small Sawyer Squeeze water filter and bag.
- Two 1.5 liter disposable plastic water bottles.
- Wide mouth neoprene canteen. I can’t recommend this one enough. Use it so you don’t have to exit your tent to relieve yourself at night.
Shoes. Your footwear will mostly depend on your personal preference. I used to hike in “waterproof” hiking boots but decided on light mesh trail runners this time. My chief concern with trail runners was lack of ankle support, which I remedied by always using poles, and wet feet. My feet were often wet, but they dried fairly quickly. My experience with boots was that they could stay dry most of the time but could not hold up to wet grass and brush. In the UK, that’s a problem. On the Coast to Coast, my boots became soaked through and heavy and did not dry completely for many days. The trail runners worked well for me. I have no intention of returning to boots for summer hiking any time soon. Do your research and pick what works for you. Make sure you settle on something you can easily replace on the trail.
The most useful bit of gear I carried was a smartphone with a full OS Map of the island, internet connectivity and GPS. For American folks reading this, getting cell service in the UK is easy and cheap. Make sure your phone is unlocked. Purchase a UK service sim card, which can be purchased online or on just about every block in London or any other city. I used Vodaphone, which worked 95% of the time. £30 buys you a month of service with domestic minutes (use your data to call outside the country using various messaging apps) and generous data allowance.
Get your gear dialed in. Train with it as much as possible. I spent a lot of time working out how to make items accessible without taking my pack off. I strapped my poles to the front of my pack for quick access and stowage, filled hip pockets with my most used items and made full use of my chest pouch. I could don nearly all my rain gear quickly without taking the pack off. Water, umbrella, everything within reach.
Food and Water
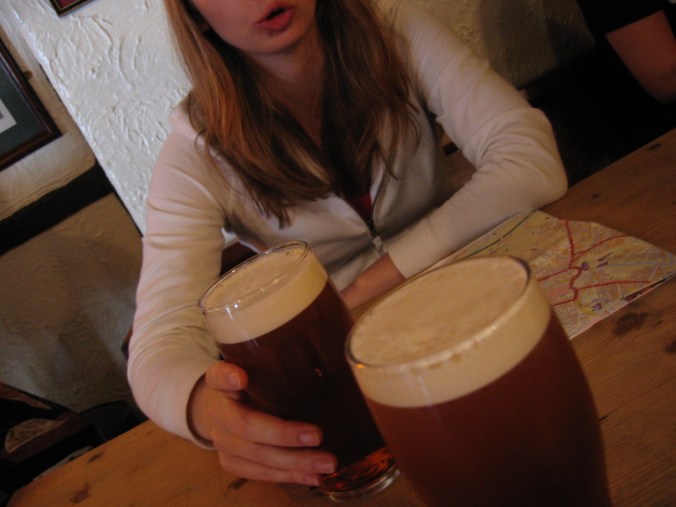
Yes, you can cook all your own food. But be aware that many campsites do not allow open flames and ban barbeques. I never cooked my own food. I really enjoy unwinding in a dark corner of a pub at night with a few beers and a hearty meal. The downside to not carrying cooking gear is that morning coffee can be often hard to find.
One aspect that sets walking in the UK apart from hiking in most of the rest of the world is that you are never far from a village, and more times than not, your footpath is intended to take you to the next village, town or city. Most communities will have some provision for food. I managed 177 pubs in my 80+ days on the trail. There was only a couple of days where I couldn’t get into a pub.
For the nonEnglish, it’s important to know that pubs in England can have weird food hours. Some pubs open for a short period for lunch, close and reopen for dinner. Some have no lunch. Many pubs, don’t serve food on certain days or don’t serve much food at all. In rural pubs, you may find that a pub has a limited Sunday menu. Then there is the issue of “booking” a seat. I’ve been turned away because a pub is fully booked, which merely means that every table has been booked for the night and you can’t get service even if the booking is hours away. I can’t speak to Wales but in Scotland, pubs generally keep consistent food hours.

Finding the pubs and working out their unique hours can be maddening. Fortunately, I have a tip and it may be the most useful tip in this whole post: use The CAMRA Good Beer Guide App. CAMRA is an organization dedicated to preserving England’s traditional method of serving beer, known as real ale. If you are not familiar with real ale, see my post here. A few decades ago, real ale was on the brink of extinction. CAMRA brought back the tradition in a big way. As part of their efforts, they published a guide to advertising pubs which served real ale. CAMRA recently built a new app that allows users to access info and ratings regarding, not just pubs in the “Good Beer Guide” but any pub that serves real ale. These days, real ale is served in almost every pub and the result is an extremely robust location-based app which is rich in information important to a hungry rambler. The app boasts 40,000 entries. In the app, you will find easy to understand hours and food service times. Always call before if you are going to rely on a single pub for a meal. You must purchase a subscription for the app, which will set you back, £1-£5.
Most villages will also have a village store (often also the Post Office), Co-Op, Spar or gas station convenience store. These are great for cheap and light meals. Often they have a great deal for a premade sandwich, soda, and chips. This was a popular lunch option for me. Also a great source of fruit and granola bars, which was my morning staple. Grab enough for 3 or 4 days.
On the rare occasions in which I knew I would not have somewhere to stop for dinner, I kept a store of tuna, chips, maybe some bread.
Water is easy to come by in the UK. Every campsite has a clean water source. All water from a spigot on the island is potable. I carried three liters and never ran out and had to use my filter. I’d bring a filter anyway.
Resources
As noted above, I believe your best resource is the OS Map and the LDWA website’s database of paths.
One popular book resource is the Cicerone End to End Trail Guide . I did not find the guide particularly useful. It was published over a decade ago, in an age of no smartphones and fewer maintained long-distance footpaths. EDIT: It was updated in 2019. The new version maybe worth a look.
The Lands End to John o’ Groats Association website has a good bit of information on in concerning routes and walkers’ accounts. For a few pounds, they will send you a guide (although I didn’t find it very helpful) and put you in contact to talk to someone about your route.
Need inspiration? Read John Hillaby’s fantastic account of his 1960s LeJog adventure.
A blogger named Mark Moxon also has a helpful guide to walking LeJog.